
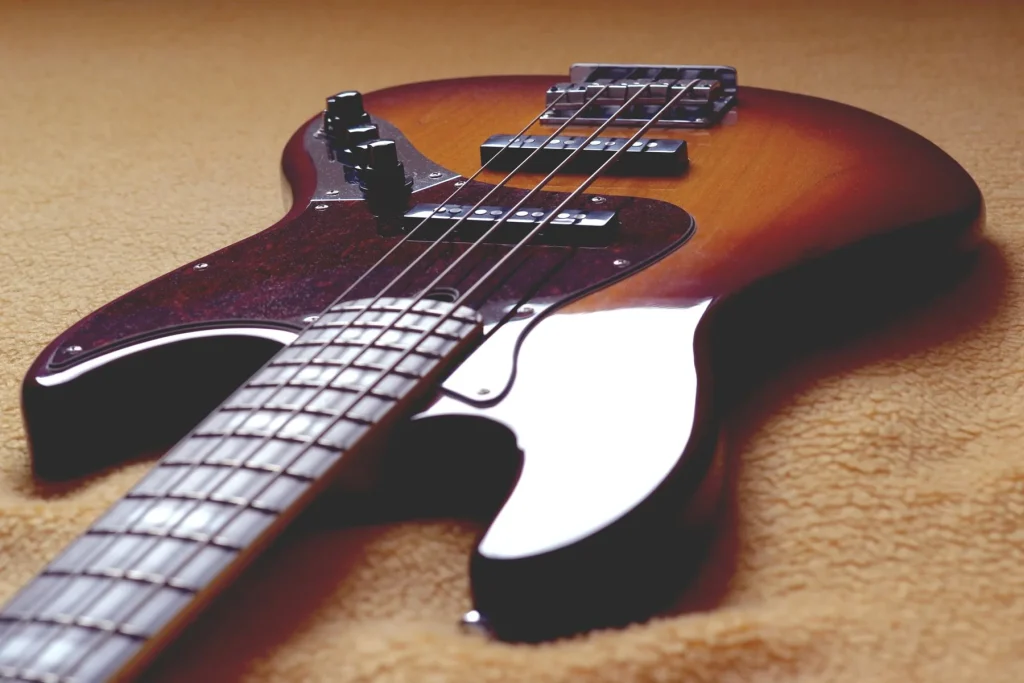
A clear, practical guide to structure your learning. The goal: become more independent, accurate, and quick on your instrument through a step-by-step method.
The basics are simple: identify fixed reference points (5th fret, 12th fret), practice octave shapes, and find notes beyond the 12th fret. This chromatic approach helps you memorize notes without information overload.
Why it helps: better communication at rehearsals, faster reading of sheet music, and the ability to transcribe songs. Start with the E and A strings, then use octaves to fill in the D and G strings.
The plan includes short daily exercises, web and mobile tools, and accurate tuning so your ear can confirm each reference point. Put it to use immediately: apply it to scales, chords, and improvisation to turn theory into instinct.
Why memorizing fretboard notes changes your playing
Knowing the names of the notes on the fretboard transforms your approach to music. It speeds up learning songs and makes sheet music easier to read.
Visualizing the 12th fret helps greatly: it repeats the open-string notes and initially cuts the area you need to memorize in half. This reference point clarifies positions and helps you locate a note quickly.
At rehearsal, talking in note names rather than fret numbers helps musicians understand one another and simplifies communication. The band saves time, and you play more efficiently.
- Choosing the best position for a line makes playing more fluid.
- Reading becomes more natural, and sight-reading becomes faster.
- Saying note names during a lesson helps you remember them.
- Less hesitation means more confidence and a stronger sense of rhythm.
- Over time, you will improvise, transcribe, and compose with greater confidence.
To go further, consult this detailed guide to fretboard notes. These simple tips have a direct effect on your playing and musical life.
Learn the bass guitar fretboard: quick reference points
A few well-chosen reference points are enough to navigate the fretboard confidently.
Key points to remember
Fretboard markers: the dots at the most visible frets serve as landmarks. The 12th fret acts like a mirror: it repeats the notes of every open string and reduces the area you need to learn.
The repetition rule and chromatic movement
The 5th fret gives you the note of the next higher open string: it is a useful shortcut for finding your way quickly.
Move one fret at a time to cover every note without skipping any. This method highlights an exception: E–F and B–C are only one fret, or one semitone, apart.
- Pair each visual marker with its note name to remember it.
- Move chromatically along one string to the 12th fret to hear the octave repeat.
- Include these reference points in your warm-ups until you can use them without thinking.
Prepare your instrument and mind for effective learning
A good practice session always begins with accurate tuning and a clear intention. Check standard tuning with a reliable tuner and check the intonation. An out-of-tune string distorts every connection you make between fingering and sound.
Standard tuning and accurate open strings
Before each session, make sure every string is at the correct pitch and sounds in tune when played open. Your ear can then confirm what your eyes learn on the fretboard.
Overcome the mental barrier and follow a method
Feeling intimidated by the fretboard is common. Divide your study into short, measurable steps. Ten minutes a day is often more effective than an occasional long session.
- Tips: schedule short practice periods, record your progress, however small, and celebrate it.
- Repeat slowly, listen to each note, and correct the intonation as needed.
A 12-fret map: understand octave repetition
The key to memorizing the fretboard map lies in the first 12 frets. Beyond the 12th fret, the pattern repeats an octave higher. The 13th fret corresponds to the 1st, the 14th to the 2nd, and so on.
A simple rule: add 12 frets to get the same note one octave higher. For example, an F# at the 4th fret will sound as F# at the 16th fret (16 − 12 = 4).

Practical tips:
- Knowing the first 12 frets means knowing every note on the fretboard.
- To name a position beyond the 12th fret, subtract 12 from its fret number.
- Memorize one reference point per string: locate the natural and altered notes.
Quick exercise: play a note, then play it again 12 frets higher. Listen to the octave relationship to develop your ear. This way of thinking simplifies navigation and helps you find alternative positions for difficult fingerings.
A step-by-step method: learn the E and A strings first
Start with a small area to make quick progress without overwhelming yourself. Working on only the E and A strings lets you memorize 14 note positions (frets 0 to 6) before expanding your study.
Step A: frets 0 to 6 on E and A
Memorize frets 0 to 6 on each string. That gives you 14 note positions, including the open strings.
Tip: play chromatically, one semitone per fret, and say each note name aloud.
Step B: frets 7 to 12 on E and A
Continue without a break: work through frets 7 to 12 to complete the first half of the fretboard.
This continuity strengthens your understanding of sharps and flats and prepares you for octave repetition.
Step C: matching the 6th fret to the 1st fret
Check that the 6th fret of one string matches the 1st fret of the next string.
This link between positions makes it easier to find your way as you play.
Quick exercises:
- Say and play each sequence of notes, slowly at first and then faster.
- Blind test: name the note at a randomly chosen fret.
- Repeat daily until you recognize the notes immediately.
| Step | Area | Goal |
|---|---|---|
| A | Frets 0–6 (E & A) | Memorize 14 note positions and learn the chromatic order |
| B | Frets 7–12 (E & A) | Complete the first half of the fretboard |
| C | Relationships between strings | Confirm 6th fret = 1st fret to connect positions |
Find all the other notes using octaves
The octave shape lets you quickly find a note an octave higher without searching for it.
Simple principle: from a note, move up two frets and across two strings to get the same note one octave higher.
This pattern works across the entire bass guitar and the whole fretboard, provided the instrument is properly tuned.
Vertical octave shape: +2 frets, −2 strings
For example, start with F on the E string at the 1st fret. Move up to the 3rd fret and across to the D string: you will find an F one octave higher.
Transfer the pattern to D and G
Applying this shape to the other strings quickly fills in your map of the notes. Always check by ear: the same note name in a higher register confirms the relationship.
- Tip: connect octaves diagonally to create melodic lines while strengthening your memory.
- Check your tuning before learning: inaccurate octaves can lead to lasting mistakes.
- Moving the shape to several places on the fretboard helps you use it without thinking.
To explore these techniques and find fretboard notes more quickly, consult this practical guide to finding all the notes.
Shortcuts for navigating the fretboard
Moving quickly around the fretboard becomes simple when you know two reliable shortcuts. These reference points help you find a note and reposition yourself in one move, even under pressure.
5th fret = the next higher open string
The 5th fret of a string matches the open string immediately above it in pitch. This reference point helps you tune by ear and quickly check a note’s pitch.
To rebuild the map of a string, play its 5th fret and then the next open string. Repeat slowly until you remember the connection.
Beyond the 12th fret: repetition and connection
The 12th fret marks the octave repetition of every note. Beyond this fret, positions repeat: the 17th fret corresponds to the 5th (+12).
Simple routine: check the 5th fret, then play the 17th to connect the two halves of the fretboard. This confirms accurate intonation and creates a mental link between the positions.
- On stage: use the 5th fret to find your place quickly if you lose track.
- Combine the 5th fret and octave shapes to reach your target note by a short route.
- Practice slowly first, then with a metronome to memorize these shortcuts.
Daily exercises for remembering note names
Repeating simple exercises each day turns knowledge of the notes into instinct. Three quick routines are enough to memorize positions between frets 0 and 11.
Circle of fifths (in fourths order)
Work through the circle in fourths order, slowly at first and then with a metronome
Choose a note, then play every occurrence of it on the fretboard between frets 0 and 11, from low to high.
Start very slowly. Then add a metronome to steady your rhythm and response time.

Say note names while playing broken scales
Play broken scales and say each note name aloud. Naming the notes reinforces your memory of them.
Alternate between sharps and flats to practice enharmonic equivalents and quick recognition.
Find a target note on every string
Choose a note and find it on every string within the first octave. Repeat the exercise until you recognize it immediately.
Sample routine: 10 to 15 minutes a day, alternating between the circle, saying note names, and searching for target notes.
“Measure your progress: time your responses and record how they improve week by week.”
- Start slowly, then increase the tempo with a metronome.
- Say the names of the notes aloud to strengthen visual and auditory connections.
- Assess your progress and vary the exercises to keep improving.
Tools and apps to speed up learning
Digital tools can help you strengthen your knowledge.
musictheory.net/exercises/fretboard offers an interactive exercise for 4-, 5-, and 6-string basses. You can customize the tuning, adjust the difficulty, and get immediate feedback.
Set a target score (for example, 90% or higher) to confirm your progress before increasing the difficulty. This turns the test into a structured learning path.
FretBoardLearn (Android)
The free app offers a validation mode to help you memorize each answer, followed by a speed mode to reduce your response time.
It also includes an “all notes with the same name” mode, useful for exercises based on the circle of fifths.
- Recommended method: use the tool for 5 minutes at the start of a session, then practice on your instrument.
- Track your statistics to adjust the difficulty and measure your progress.
- These resources complement practice on the instrument; sound and touch remain essential.
| Tool | Key feature | Suggested use |
|---|---|---|
| musictheory.net | Custom tuning, immediate feedback | Progressive tests and target scores |
| FretBoardLearn | Validation mode, speed mode, search by note name | Memorization, then faster responses |
| Combined method | Alternating between web and mobile tools | 5 minutes before playing and progress tracking |
Find the note C anywhere on the fretboard
Identifying C on every string gives you an immediate reference point. It makes reading music and building bass lines easier.

4-string bass: to find your way quickly, locate C at these positions.
- E: 8th fret
- A: 3rd fret
- D: 10th fret
- G: 5th fret
5- and 6-string basses
On a 5-string bass, add C at the 1st fret of the low B string to cover the lower register.
On an extended 6-string bass, you will find C at the 1st fret of the B string and at the same positions as on a 4-string bass. On some extended models, the high string may be tuned to open C.
Recommended exercise: play every C from low to high, then reverse direction. Repeat slowly, then increase the tempo.
Practical tip: connect these positions with octave shapes to see and hear each C and its equivalent an octave higher.
“Finding the root C in several places helps you adapt your fingerings when playing.”
| Instrument | Key C positions | Use |
|---|---|---|
| 4-string bass | E 8th, A 3rd, D 10th, G 5th | Central reference point for bass lines and transcriptions |
| 5-string bass | B 1st, E 8th, A 3rd, D 10th, G 5th | Covers the additional low register |
| 6-string bass | B 1st, E 8th, A 3rd, D 10th, G 5th, open C (high string, if present) | Full range; useful for extended parts and solos |
Apply the notes to music: scales, chords, and improvisation
Using equivalent positions makes creating bass lines more fluid. Here, theory and practice come together to produce phrases you can use in music.
Chromatic scales and enharmonic equivalents
Practice chromatic scales while naming each sharp and its enharmonic equivalent (C# = Db, G# = Ab). This habit makes reading and adapting to any key more fluid.
Repeat chromatic passages across several strings, checking the 5th fret and the repetition at the 12th to keep the notes consistent.
Build lines by connecting equivalent positions
Combine octaves, the 5th fret, and repetition at the 12th to create horizontal and vertical lines. This helps you quickly find roots, thirds, and fifths in different places.
Practical application: improvise by alternating movement along one string with octave jumps. Vary your fingerings and positions to become more flexible and avoid being confined to a single shape.
| Goal | Technique | Result |
|---|---|---|
| Read every note name | Chromatic and enharmonic exercises | Adapt quickly to different keys |
| Create moving lines | Connect the 5th fret, octaves, and 12th fret | Consistent lines across the fretboard |
| Improve improvisation | Alternate horizontal and vertical movement | More melodic options and solid grooves |
“Use these principles in real grooves to turn your knowledge into musical instincts.”
Common mistakes and how to avoid them
Knowing where the important semitones lie saves a great deal of time.
The most common mistake is assuming that natural notes are always two frets apart. In fact, E–F and B–C are only one fret apart. This detail catches out many students and causes confusion while playing.
Mark these semitones visually on your bass guitar fretboard. A reminder, such as a pen mark on a practice note or a note on your sheet music, helps reduce mistakes when playing.
Another major problem is inconsistent practice. Without short, frequent sessions, your memory fades. Take your time: making progress over several months is normal.
- Check each note by ear to connect its name with its sound.
- Work string by string, then gradually bring your knowledge together.
- Return immediately to a useful reference point (the 5th or 12th fret) whenever you are unsure.
| Mistake | Cause | Quick correction |
|---|---|---|
| Confusing E–F / B–C | Assuming a two-fret gap | Mark the semitone and check by ear |
| Inconsistent practice | Long, infrequent sessions | 10 minutes a day and a simple test |
| Information overload | Working on too many areas at once | Work by string and by area |
Tips: measure your progress, avoid rushing, and correct mistakes promptly. If you need a plan, start with small, regular blocks of practice.

A 12-day action plan: from reference point to instinct
Following a clear schedule helps turn study into instinct. This program divides the work into short blocks to avoid mental overload and build automatic responses.
Day by day: short blocks, spaced review, and timed tests
Plan 12 days of sessions lasting 10 to 15 minutes. Start with frets 0 to 6, then move on to frets 7 to 12.
- Days 1 to 3: E and A strings, frets 0 to 6, note names spoken aloud, and the 5th and 12th frets used as reference points.
- Days 4 and 5: E and A strings, frets 7 to 12, chromatic continuity, and first tests on musictheory.net or FretBoardLearn.
- Days 6 and 7: octave shapes (+2 frets, −2 strings) and transferring them to D and G.
- Days 8 and 9: the circle of fifths in fourths order, then the same exercise with a metronome to work on rhythm and response time.
- Days 10 and 11: broken scales with note names spoken aloud, timed tests, and a target score of at least 90% in the app.
- Day 12: a full review: find a target note on every string and reinforce areas you know less well.
Tip: plan spaced weekly reviews to retain what you have learned and make this method a lasting routine.
“A small, regular effort is better than an occasional long session: keep a steady rhythm and measure your progress.”
Conclusion
Knowing every position well speeds up your playing and simplifies your choices at rehearsal. Reference points (the 5th fret, the 12th fret, and octave shapes) and a gradual method focused on the E and A strings slowly turn your fretboard knowledge into instinct.
Practical goal: find every note without hesitation and instantly adapt your fingerings to build effective lines and chords.
Musical result: stronger lines, better-targeted chords, and freer improvisation. A few minutes a day are enough to develop these habits.
Continue the suggested exercises, work through the circle of fifths, and use digital tools to keep your momentum. This work helps you prepare sets faster, communicate better, and play with more confidence.
In short: a simple, structured method applied to the music you want to create and share.