
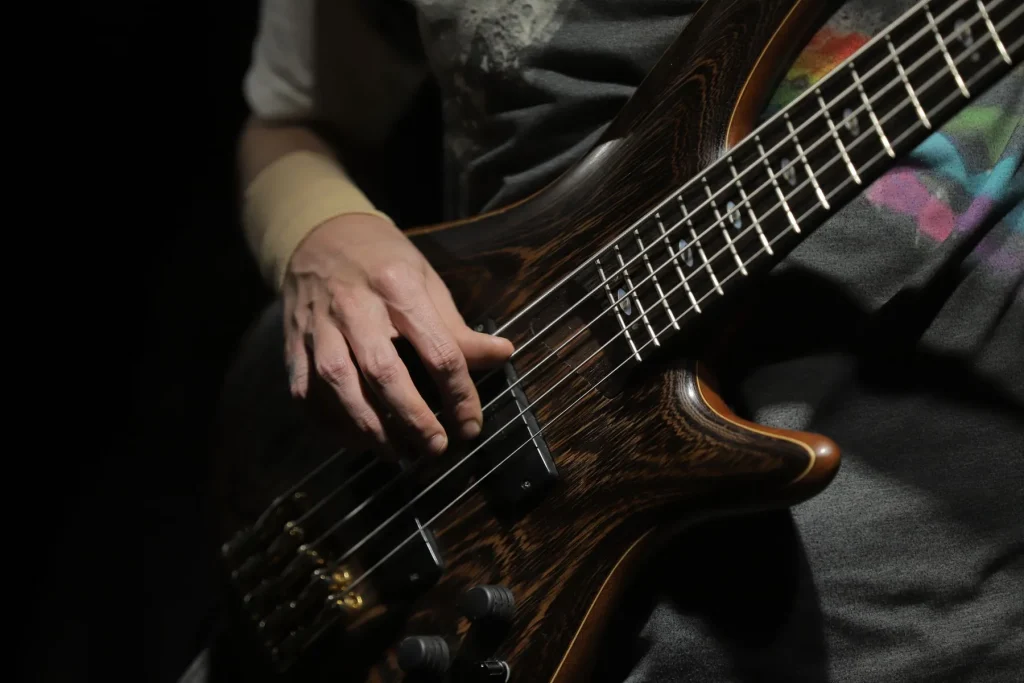
Guide objective: help you choose a bass that suits a young player and makes learning comfortable and motivating. This guide explains practical considerations, the role of scale length and the ergonomic choices that encourage regular practice.
Scale length is measured from the bridge to the nut: it is a reliable way to compare models. It determines fret spacing and perceived string tension. Half-size (~530 mm), three-quarter-size (~580 mm) and full-size (~650 mm) formats provide age and size guidelines.
Short-scale basses and ergonomics: shorter models are better suited to small hands. They are lighter, easier to play and encourage regular practice. In a shop, check your child’s posture, strap height and reach to the first few frets.
Suggested starting budget: around €150–225. An electric bass can be played through headphones, keeps noise down at home and offers a wide range of sounds. Avoid very cheap toy instruments; choose an adjustable bass with a truss rod.
For more on choosing a size that suits the player’s build, see this practical guide: choose the right size.
Why choose a bass for a child? Understanding their interests and learning path
Choosing an instrument starts with understanding what appeals to the child: groove, rhythm or simple curiosity about music.
Teachers recommend models that are easy to play. Flexible strings and a short scale reduce finger pain and help prevent poor posture.
Learning benefits:
- Develops rhythm and coordination between the right and left hands.
- Builds listening skills, discipline and abilities that are useful at school.
- Offers motivating progress: simple bass lines, backing tracks, then playing with a group.
To keep the momentum going, set small weekly goals and choose favourite songs as rewards. The instrument’s shape and sound can be decisive in encouraging regular practice.
Parents’ role: offer encouragement without pressure and make time for short, regular sessions. An initial assessment with a teacher can confirm the choice and prevent frustration caused by an unsuitable instrument.
Bass guitar for children: size, weight and comfort
The chosen size has a major effect on playing. Matching scale length to the young player’s build helps prevent fatigue. For small hands, look for a slim neck with a C-shaped profile.
Age, height and build
Useful guidelines: half-size for ages 6–9 (~530 mm), three-quarter-size for ages 8–11 (~580 mm), and full-size for ages 12 and up (~650 mm). Children aged 7–11 often choose short-scale basses of around 28″–30″.
Balancing size and weight to prevent fatigue
Look for a light, well-balanced instrument with a wide, nonslip strap. A neck that dips or uneven weight distribution tires the left hand.
- Try the instrument sitting and standing: check that the child can reach the first few frets without raising a shoulder.
- Flexible, light-gauge strings improve playability and reduce finger pain.
- Reassess the size every 6–12 months as the child grows.
| Age | Scale length | Benefit |
|---|---|---|
| 6–9 years | ~530 mm (half-size) | Short neck, easy to handle |
| 8–11 years | ~580 mm (three-quarter-size) | Good balance of handling and sound |
| 12 years and up | ~650 mm (full-size) | Full tonal range |
Tip: at home, playing an electric bass through headphones keeps noise down and allows longer practice sessions.
Choosing the right bass size: half-size, three-quarter-size, short-scale or full-size?
Choosing the right instrument size makes a real difference. Measure the scale length from the bridge to the nut: it is a reliable way to compare models in a shop.
Common formats:
- Half-size (~530 mm): for younger children and small hands.
- Three-quarter-size (~580 mm): often recommended for ages 8–11; a good compromise.
- Short-scale (28″–30″): lower tension makes bends easier.
- Full-size (~650 mm or 34″): a standard format for teenagers and larger players.
Age and height guidelines
Below about 145 cm, consider a three-quarter-size or short-scale model. From age 12, or once the child’s hands have grown, gradually move to a full-size bass.
Typical scale lengths and their effects
A shorter scale brings the frets closer together, reduces tension and makes hammer-ons easier. It supports dexterity and reduces fatigue.
When should you change size?
Consider a change when the child can reach the first fret without strain but feels restricted on the neck. Check their seated posture: the hand should rest around the third to fifth frets without the wrist bending excessively.
Tip: measure the fretboard length in the shop to help choose between two similar models.
Weight and ergonomics: what parents should check in the shop
Before buying, test the instrument’s balance while standing to avoid surprises.
First, check for neck dive: ask the child to gently release the neck with their left hand while standing.
If the headstock drops toward the floor, the balance is poor and the shoulder may tire quickly.
Ask for the instrument’s weight or weigh it. Choose a light model for a young player. A heavy instrument shortens the time they can play comfortably.

Weight distribution, neck and body balance, and shoulder fatigue
Check the position of the strap button: it changes the instrument’s angle.
Poor placement can cause neck dive.
Test how the instrument resonates when played. A bass with a dull response may take more effort to produce a sound, which can discourage children.
Body shape and contours: access for both hands
Check the body contours (belly cut and forearm contour). They reduce pressure on the right forearm and torso.
- Test access to the first and last frets: the child should be able to reach them without strain.
- Choose a wide strap (5–8 cm) with a nonslip surface to distribute the weight better.
- Avoid toy instruments: their lack of rigidity and poor ergonomics hinder learning.
Tip: try several models while sitting and standing. The fit makes a real difference.
The neck: nut width, profile and radius for small hands
Comfort starts at the nut: width, profile and radius all matter.
C-shaped versus U- or V-shaped profiles
C-shaped profile: slim and versatile, it reduces the stretch between the fingers and makes playing easier for small hands.
U-shaped profiles and V-shaped profiles are thicker or more angular; they require more effort and rarely suit beginners.
Nut width and string spacing
A nut that is too wide forces the fingers to stretch. One that is too narrow demands greater precision and can cause string buzz.
Test the string spacing at the saddles: there should be enough room to place a finger without muting the note. Also check the finish of the fretboard and fret edges: smooth edges prevent irritation and cuts.
- Fretboard radius: a more curved surface can help with finger placement; a flatter surface can make low action and accurate playing easier.
- A truss rod is essential for adjusting neck relief to the chosen string gauge.
- Try common finger positions, such as placing the middle and ring fingers on the lower strings, to see whether the hand settles naturally.
Tip: neck comfort can matter more than appearance: you can feel a good fit within the first few minutes.
Bass strings for beginners: comfort first
Smoother strings make learning easier by reducing friction and perceived tension. The choice affects finger pain, practice time and motivation.
Flatwound, roundwound and nylon tape: feel, sound and finger pain
Roundwound: a bright sound and pronounced attack, but a rougher feel.
Flatwound: a smooth finish, quiet movement along the string and more comfort for the fingers during the first few weeks.
Nylon tape: a metal core wrapped in nylon, with a very soft feel that helps minimise finger pain.
Light gauge: why it makes learning easier
A light gauge reduces tension. Playing feels easier, and bends and vibrato become more accessible.
A gauge that is too heavy increases fatigue and slows progress. Whenever you change gauge, adjust the truss rod and action to avoid string buzz.
- Flatwound and nylon tape: a rounded, vintage sound; roundwound: brightness and attack.
- Keep a spare set of identical strings so the feel remains familiar.
- Give the strings a quick wipe after each session to extend their life.
Priority: choose comfort to encourage longer, more regular practice sessions.
| Type | Feel | Sound | Recommended for |
|---|---|---|---|
| Roundwound | Rougher | Bright, punchy | Rock and funk styles; more experienced players |
| Flatwound | Smooth, soft | Rounded, vintage | Beginners; long practice sessions |
| Nylon tape | Very soft | Warm, mellow | Very young players; sensitive fingers |
Electric or acoustic bass for a child?
For a young beginner, this choice affects everyday practice. Consider volume control, ease of handling and the range of sounds available.
Practical benefits of an electric bass: headphones and versatility
An electric bass connects to an amplifier or audio interface. It can be played through headphones, keeping noise down at home.
Small 10–20 W amplifiers or combo amps with a headphone output work well. They provide controls and a wide range of sounds through effects or plugins.
Ergonomics: its often slimmer, better-balanced body can be easier for a young player to hold.
Benefits and limitations of an acoustic bass for younger players
An acoustic bass works without an amplifier. It is useful when travelling, but a small model may lack definition in the low notes.
Its large body can be awkward to hold, and the high action on some entry-level models makes playing harder.
- Electric: quieter practice, exploration of different styles and playing along with backing tracks.
- Acoustic: works without an amplifier, but cannot be muted completely.
- Acoustic-electric: a reasonable compromise if the body size suits the child.
Conclusion: for most young players, a short-scale electric bass remains the most comfortable and motivating choice.
Quick comparison: bass or guitar for a young beginner?
The child’s musical preferences often guide the choice. If they love grooves and low bass lines, rhythm parts may motivate them more. If chords and melodies appeal to them, a guitar may be more engaging.

Different roles: the bass supports the rhythm and plays low lines. The guitar plays chords and solos. Both paths are rewarding and complement each other.
- First steps: simple lines and a steady tempo on bass; chords and chord changes on guitar.
- Physical demands: basses have a longer scale, though a short-scale model reduces the reach; nylon strings on a classical guitar reduce finger pain.
- Motivation: let favourite songs guide the choice to encourage regular practice.
Cost and switching instruments: the initial investment is similar. An electric bass also needs an amplifier. The child can switch between the two instruments later; the skills they learn will still help with group playing and musical development.
Tip: trying both instruments in a shop quickly reveals which one appeals more to the child.
Sizes and scale lengths: practical checks for a shop visit
Trying an instrument in a shop is essential: bring a tape measure and note how each model feels after a few minutes of playing.
Measuring scale length: from bridge to nut
Find the nut at the top of the neck, then locate where the strings rest on the bridge saddles.
Measure the vibrating string length between these points. Examples: half-size ≈ 53 cm, three-quarter-size ≈ 58 cm, standard size ≈ 64–66 cm.
Short-scale basses worth trying in a shop range from about 28″ (711 mm) to 30″ (762 mm).
Signs that an instrument is too big or too small
- Too big: an excessively bent wrist, a raised shoulder, difficulty reaching the first fret and rapid fatigue.
- Too small: reduced sustain, cramped fingers and unpredictable intonation in the low notes.
Practical tip: try each model for 5–10 minutes, first sitting and then standing. Check its stability with a strap and the fret spacing between the first and fifth frets.
Tip: ask the salesperson for the official fretboard length and choose a size that supports good technique rather than buying too far ahead of the child’s growth.
| Size | Approximate measurement | Benefit |
|---|---|---|
| Half-size | ~53 cm | Short, accessible neck |
| Three-quarter-size | ~58 cm | Good balance of handling and sound |
| Standard | ~64–66 cm | Full tonal range |
Action, adjustments and playability: why a beginner setup matters
A suitable setup immediately improves how a beginner’s instrument feels and plays in tune.
Action is the height of the strings above the frets. If it is too high, fingers hurt and practice sessions get shorter. If it is too low, notes buzz and intonation suffers.
Truss rod: it adjusts the curve of the neck for the chosen string gauge and the surrounding humidity. Correct neck relief helps prevent buzzing across the fretboard.

Key adjustments to request in the shop
- Adjust the height at the bridge, string by string, and check the intonation.
- Choose a light string gauge to make playing and bends easier.
- Check the frets (level and finish) and nut (slot depth).
Ask the instrument technician or salesperson for a beginner setup: it is often included or offered at a modest price. Small adjustments may be needed as the seasons change.
Tip: keep a record of the setup measurements that suit the child for future maintenance. The first setup has a major effect on how good the instrument feels.
Wrists, posture and strap: establish comfort from day one
Good posture prevents bad habits and helps the child enjoy playing for longer.
Neutral posture: a straight back, relaxed shoulders and a stable seated position. Keep the wrists aligned with the forearms to limit strain.
Strap height: adjust it so standing feels much like a comfortable seated position. Avoid letting the neck hang too low, which can force the shoulder upward.
Left hand: keep the thumb near the middle of the back of the neck and the fingers curved, without gripping tightly. Right hand: keep the wrist only slightly bent and rest lightly on the strings or pickup, depending on the playing style.
Useful equipment: a wide, adjustable, nonslip strap; an appropriately sized stool and a footrest for a stable seated position.
- Take regular breaks and do a few gentle stretches.
- Use a metronome to establish steady playing.
- At first, parents should watch for and correct awkward postures.
Tip: getting the position right from the first lesson encourages longer sessions without discomfort.
Budget and value: how much should you spend to get started?
How much should you budget for a first instrument that makes the child want to play?
Realistic range: expect to spend €150–225 on a suitable short-scale bass. Allow at least around €69 for a small beginner amplifier. Even with headphones and accessories, the total can remain manageable.
Starter packs make buying easier by including a case, tuner and picks. Quality varies by brand: some packs are complete, while others may disappoint.

Starter packs, essential features and resale
- Check that the truss rod works and the bridge is adjustable: these features are essential.
- Budget for spare strings and a sturdy strap.
- An amplifier with a headphone output makes practising in an apartment easier.
- Compare 2–3 models to find the one that feels natural in the child’s hands.
Tip: if the child takes regular lessons, spending a little more can get you better tuning machines and frets.
| Budget | What it covers | Benefit |
|---|---|---|
| €150–225 | Short-scale bass | Good value |
| ~€69 | Small amplifier | Headphone practice and volume control |
| Complete pack | Instrument + amplifier + accessories | Simple purchase; variable quality |
For more information before you buy, consult a buying guide. Ultimately, the right bass is one the child enjoys playing every day.
Design and motivation: appearance can encourage regular practice
When young players like the look of their instrument, they are more likely to pick it up often.
Design can affect motivation: an appealing model encourages spontaneous practice.
Let the child help choose the colours and shape while keeping size and playability in mind.
Remember: style should not hide technical shortcomings. Always prioritise a suitable neck and manageable weight.
- Choose a restrained finish if the school requires a less conspicuous instrument.
- Use removable stickers to personalise the instrument without harming its resale value.
- Avoid delicate finishes that scratch at the slightest knock.
If the budget is tight, favour a timeless appearance and durable construction.
Tip: take inspiration from the child’s favourite artists, then try the model in a shop to see how it actually feels.
| Feature | Why it matters | Practical tip |
|---|---|---|
| Design | Encourages daily practice | Choose together with the child |
| Finish | Affects durability | Avoid delicate finishes |
| Personalisation | Helps the child feel the instrument is their own | Use removable stickers |
Conclusion: an appealing appearance adds to sound quality, but playing comfort must still come first.
Age and progress: which bass size suits each stage?
The move from small instruments to standard sizes should be gradual. This supports good technique and keeps playing enjoyable.
Young children (ages 5–7): consider very light introductory options such as a guitalele (for example, the Yamaha GL1) or a bass ukulele. Their smaller size makes them easier to handle.
Preteens and teenagers: moving forward with a three-quarter-size, short-scale bass
For ages 8–11, a three-quarter-size, short-scale bass offers a good practical compromise. It develops dexterity without forcing an abrupt change to a full-size instrument.
- Small models develop listening and coordination before the move to a standard instrument.
- Move up a size as the child’s body, hand strength and motivation develop.
- Reassess the size each year in light of age, height and goals.
Tip: adjust the strings and setup when changing instruments to keep the feel familiar. Keep the old instrument for travel or rehearsals.
Lesson types and methods: making learning easier
The right learning method can turn a few minutes of practice into steady progress.
There are three main options: private lessons, group lessons and online platforms.
Private lessons offer individual guidance. Group lessons build motivation and listening skills. Online lessons offer flexibility and visual resources.
Online, group or at-home lessons: finding the right option
Choose what fits your routine: in-person lessons for interaction or online lessons for learning at home.
Look for a teacher experienced with both children and bass guitar to support lasting progress.
Rhythm, coordination and listening: skills developed through playing
Bass playing develops a sense of rhythm, coordination between the right and left hands, and the ability to listen to other musicians. Practise with a metronome and backing tracks to improve accuracy.
Practical suggestions:
- Combine regular lessons with guided apps, such as a metronome and backing tracks.
- Set SMART goals: specific, measurable, achievable, realistic and time-bound.
- Choose the child’s favourite songs to maintain motivation.
- Arrange small family performances to celebrate progress.
“Short, regular and focused sessions are more effective than long, irregular ones.”
| Option | Benefit | When to choose it |
|---|---|---|
| Private lessons | Individual programme | Supporting a beginner or addressing specific technical needs |
| Group lessons | Motivation and listening to others | Playing with peers or attending an intensive course |
| Online platforms | Flexibility and visual resources | Supplementing regular lessons |
To find learning resources suitable for younger players, explore these methods for young learners.
In-store buying checklist: 10 things to check before paying
Before paying, work through these essentials to check your choice in the shop.
- Scale length and suitable size: measure the fretboard length and check that the instrument fits the child’s build.
- Balance while standing and sitting: try the instrument to check for pronounced neck dive.
- Neck and truss rod: check the neck’s straightness and that the adjustment works.
- Action: play a few notes; check for buzzing and finger pain, and confirm that the height can be adjusted at the bridge.
- Frets, nut and tuning machines: look for sharp edges, stable tuning machines and a well-finished nut.
- Strings: choose a light gauge; ask for flatwound or nylon tape strings if needed for a first bass.
- Electronics: for a starter pack, plug the bass into the amplifier; check the volume and tone controls and listen for unwanted noise.
- Finish and assembly: check for cracks, tight screws and a sturdy output jack.
- Included setup: ask for a beginner setup or a check after a few weeks.
- The child’s response: if they want to play it again immediately, you have probably found the right bass.
Tip: try 2–3 similar models to make it easier to choose the bass and its size.
Conclusion
Keep three simple priorities in mind when choosing an instrument for a young musician.
Measure the scale length (from bridge to nut) and consider a short-scale model of around 28″–30″: a suitable size makes playing more accessible.
Check the balance and weight, and look for a C-shaped neck profile and flexible strings (flatwound or nylon tape) for greater comfort.
Ask for a beginner setup, set a reasonable budget (about €150–225 plus an amplifier) and consider an electric bass for headphone practice at home.
Involve the child in choosing the design while keeping ergonomics in mind. Arrange a few lessons to give learning some structure, and reassess the instrument’s size as the child grows.
In summary: a suitable size, manageable weight and careful setup are the three essentials. A well-chosen, properly adjusted bass can lead to years of enjoyable music.